
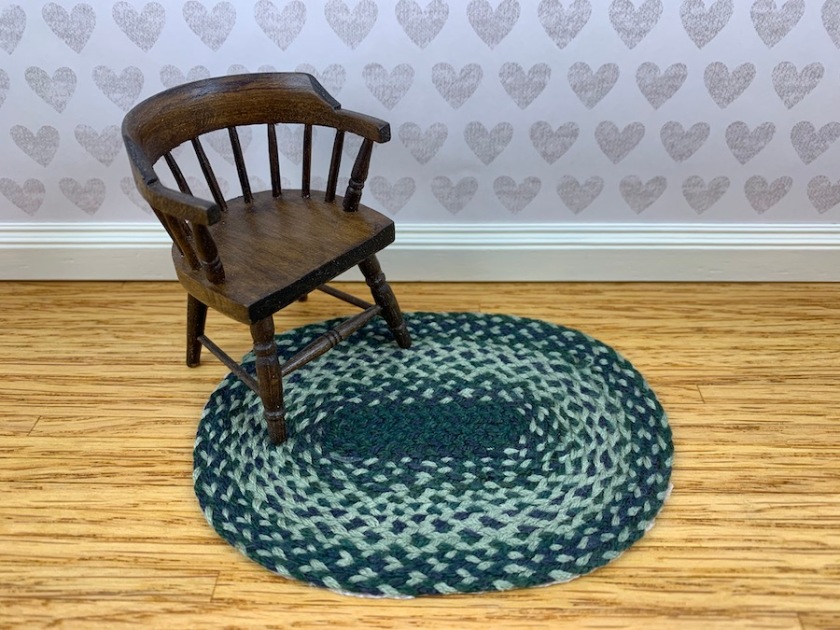
Our Eugene Miniatures Club makes something at most meetings. (We have a potluck in July and December.) We didn’t have much prep time for the January meeting so we reached back in the files. We thought, “let’s do braided rugs.”
We used the tutorial by Natalia Frank as a starting point. Then we exchanged tips to make it easier. Julie used a clipboard to hold the braid and nifty bobbins called Bob-EEZ to hold the floss. You can also pull floss directly from the skein or wind it onto a piece of cardboard. We found out that a six-foot braid will make a 2″ by 3″ rug.

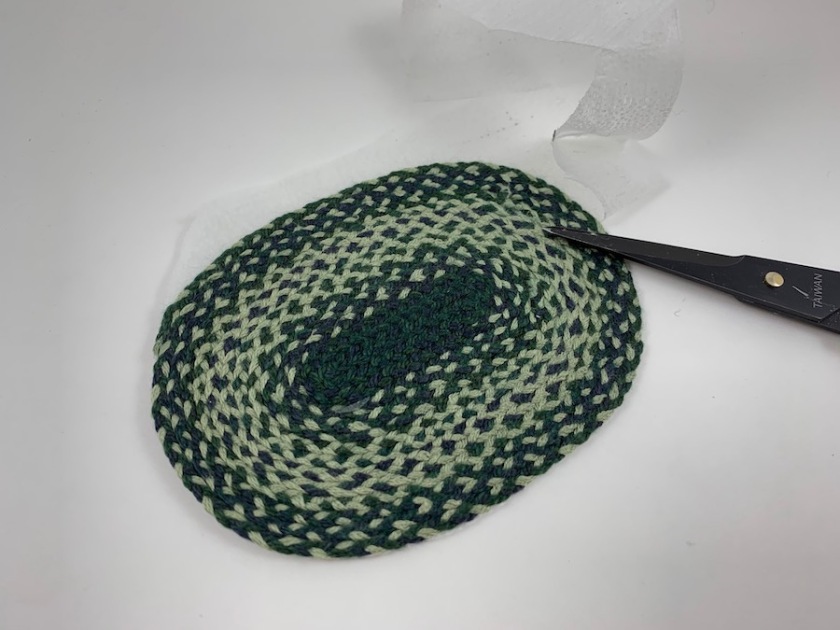
The rugs are put together on two-sided tape which can be applied to a piece of glass or even cardboard. There are two ways to vary the colors of the braid. The easiest way is to use variegated embroidery floss, making sure you match the beginning colors. In the photo below, I simply cut one of the dark green strands and tied in the light green to change color. You can start laying it out to determine where you want the new color or just leave it to chance. It is best to change just one strand at a time to keep the knots small.

I found it helpful to draw boundary lines to make my shape as regular as possible. I started with three strands of dark green, then swapped one strand for light green, then another making my lightest rows two strands of light green and one of dark green. I finished the rug with two dark and one light strand.
The next step is to put a dot of Tacky glue under each knot and press the braid into the rug. When the glue is dry, carefully cut off each knot.

Cut a piece of one-sided fusible interfacing to cover the rug with the fusible next to the rug. Cover the piece with a damp press cloth and press for 12 to 15 seconds.

When it is cool CAREFULLY peel the rug off the tape.

Trim the interfacing as close to the rug as possible. Press again.
And there you have it. A cute traditional braided rug. Now suppose you don’t want a traditional rug…

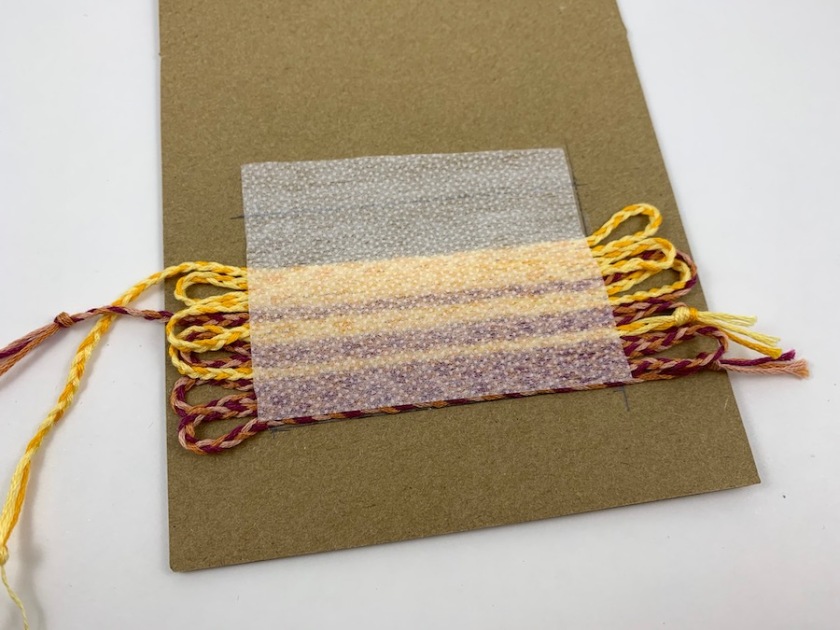
Make one or more braids and prepare your surface with tape. Then lay your braid in horizontal rows instead of an oval. Measure the fusible interfacing so that it leaves 1/2″ loops exposed on the ends. Iron on the interfacing and sew a tiny zig-zag at each end, catching the interfacing. Trim the loops and open up the braids to make fringe.


Thanks so much for visiting. Did you find the comment form? You need to scroll way down to the airmail envelope.

This is great. I may just have to make one. Thanks.
With all your houses, you will have to make several!
What a great project and I bet so satisfying to see it get bigger and bigger! I love both of your color schemes and am definitely going to file the project away to try Someday…
Fun little projects with pleasing results are the best!
Truth be known, our club meetings are gatherings of like minded individuals where we do a lot of visiting. We justify those meetings by having something tangible to take home.
I do not know how I missed this post until today. I love this! I really like the suggestion of using the clipboard to hold the end of the thread. For me, the hardest part is trying to keep the thread taught so you can bread it properly, and this looks like it works really well. Your little rugs are both wonderful. I had seen the oval kind before, but never seen anyone make the rectangular ones. That’s such a clever way of doing it!
Thanks Deborah! It is scalable! Another club member will use her rug in her half-scale Victorian. I forget whether she is using 3 strands or 2 strands, but her rug is looking adorable.